How can I design my products using Adobe Illustrator?
DISCLAIMER: This feature is currently in the beta phase and must be granted by request. Please reach out to [email protected] to request access. Note, not all styles will have templates available immediately, however more are being populated regularly.
In order to allow our users to leverage the power and custom workflows of Adobe Illustrator we are providing our overlay files in Illustrator format.
Follow these steps in order to get the quickest, best results while using these overlay files.
Click on the blue “Download Canvas Template” to get started

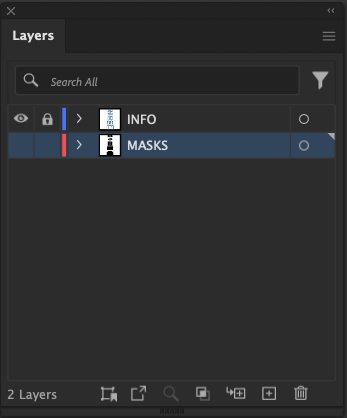
Once you open the file you will see two layers; one named “Overlay” the second named ”Mask”
Each file also will be separated into several Artboards. Depending on how complicated the garment you selected is you will have up to 5 different art boards corresponding with the tabs that are on the design portal.

Follow the overlay safe zone instructions and make sure that all critical logos and text that you don’t want going under the seams are inside that safe area.

Our online portal has been engineered so that you only have to create one layout for all size variants on a given style. This is why it's crucial to follow those safe zone indicators as they are designed to accommodate for the entire size run.
Be sure to leave the overlay layer locked as the placement of those masked areas is crucial to ensuring the final products are accurate to what you are seeing on screen
When designing on the Mask layer use the black rectangles to create a clipping mask of your panel layouts. This will help reduce file sizes, clean up the layout, and help to keep unwanted elements from appearing on other panels.

Make sure you are working in “RGB” color mode as our color calibration works best with RGB native files. Go to File>Document Color settings”and make sure that “RGB Color” Is checked. This is to help get your final garment colors to more closely match the onscreen previews. *Except for Neon ink approved accounts follow the neon ink instructions when using those inks.

When using the pattern tiling feature it's important to rasterize your art before exporting. We have noticed that some designers will run into an illustrator bug that leaves hairline gaps in their patterns when exported. In order to avoid this select objects that have a tiled pattern fill and go to Object>Rasterize Select the RGB color mode, set the resolution to 150 dpi and have the transparent background mode selected.
Once patterns are rasterized and you're happy with the layout, create your print files by going to File>Export As..

For our online portal you can upload either JPG, or PNG files. For more versatility with the online portal it is recommended to use transparent PNG files.
It’s crucial that you have “Use Artboards” checked with “All” selected as well. In order for the placement to be accurate and the files to fit on the portal tabs this step is essential.

When selecting your resolution for PNGs or JEPGs make sure its 150 dpi and for PNGS have the transparent background color selected. Having transparent PNGS can open up lots of creative possibilities when paired with our online portal. Create countless variations by changing the background color in the portal designer.

Drag the files one at a time onto the corresponding tab. If the art board and resolution setting are all correct your files will snap to fit the portal tab
Hit the preview button to generate your mock up file

If you need to make updates to your designs follow the export instructions and drag the new replacement files onto the corresponding tabs.
- Your new design will be placed on the top of your current layout
- Delete the old uploads by selecting the Chevrons “>>” to extend your layers tab
- Removing the old uploads will improve your render experience and speed up the generation of print files

Once your files are uploaded you can also layer multiple items together using your art library.
Feel free to reach out to [email protected] at any time with questions!